May 13th 2019 08:00:28am
Splines
This article is slightly different than my usual format, as I will be presenting two tutorials on splines. One video will show splines being used more in a visual effects based shot. The other will show how to attach splines to alembics specifically.
Some Backstory
Back in 2018 I worked on a TV miniseries for about three months and I actually went back to my roots doing motion tracking, building shot templates for said tracks, particle/smoke FX, crowd replication, and a variety of other visual effects, even a little compositing. All in all I touched about ninety shots total in this series.
This type of work I don’t normally do these days as I have transitioned over to 3D volumetric and particle FX about four years ago. Every so often however, I will get a call from Dennis Shin to do such work. Dennis is currently VFX supervising at Bemo in Los Angeles, CA. He’s a long time friend of mine, and I enjoy working with him very much on these types of projects. We both have a strong understanding of our skill sets and communicate very well. I respect and trust this man.
C4D and Splines

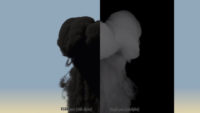
Along the way Dennis presented two shots in this miniseries that needed something unique. I’ve not dealt with creating a fully digital hospital feeding tube before, so it was fun challenge for me.
So for this one particular effect I had to build a feeding tube that had to properly slide. One actress playing a nurse was pantomiming the action of pushing the tube into another actress’s mouth. The other actress was playing an unconscious patient. A physical prop tube was held in place during the filming, but of course wasn’t actually moving into the mouth. This prop had to be removed from the scene, of which another company was tasked with, and I had to mimic the look and feel of the prop digitally. I was tasked with the build, animation, render, and composite.
You can view the breakdown for that effect starting at the 0:10 second point in this video.
I knew I was going to use a spline to create the tube itself, but had to troubleshoot getting it to feel like it was moving forward as the nurse pushes it into the patients mouth. In this tutorial I’ll show you how I used animated nulls, connected individual spline points to those nulls, and how I created the final render material in Redshift3D.