July 08th 2019 08:00:57am
M7.1
First a note about this past week. As many people know by now, the town of Ridgecrest California has been hit by two major earthquakes back to back. A magnitude 6.4 on July 4th and a 7.1 on the night of the 5th. Since then quite literally 1,000’s of aftershocks have happened since. Many homes and businesses sustained damage and it will be a long road to recovery for the residents of Ridgecrest.
My wife and I live in Glendale California about 105 miles southwest of Ridgecrest. Even with that great distance we clearly felt the foreshock and the main shock as well as many of those after shocks since July 4th. Living on the third floor amplifies the movement a lot too. We are both ok and did not sustain any damage ourselves other than some rattled nerves.
Being the visual effects geek that I am, I had to stabilize footage I had recorded during the quake just to better view the movement of what was shifting in our home. Of course I used my own stabilizer script for After Effects.
I had recorded today’s tutorial two days ago on Saturday the 6th. A few aftershocks were just large enough to be felt that morning, but thankfully no large quakes occurred during recording, so there shouldn’t be any noise on the audio track (as far as I could tell), but if you do hear any deep sounds that will likely be from the aftershocks.
Back On Topic: Liquid Sim
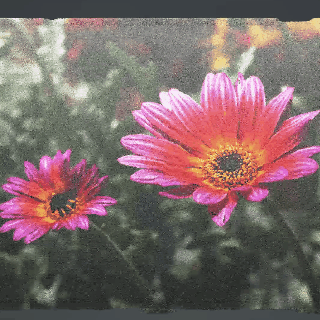
So today’s tutorial focuses on building a simple liquid simulation, and then mapping the color values from an image onto the particles. Not projecting the image colors, which you will also see in the tutorial, but actually assigning each particle a color value from the image at birth.
X-Particles contains a few different methods for applying color to particles, and each way functions very differently. It can be confusing as to which way works best for your situation. There will be two types of animations we’ll make today, and I will show you a couple of these color application variants.
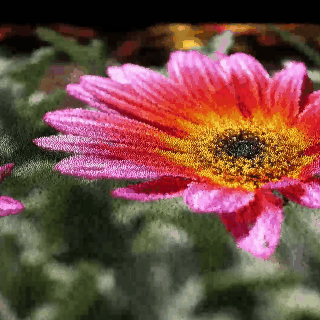
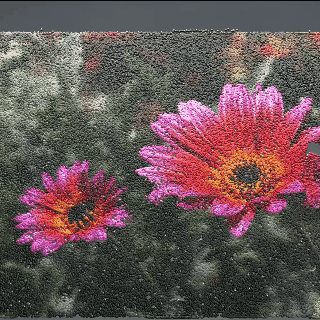
These GIFs show a melting style liquid image that I had done where I was using a noise shader to activate the movement of the particles. The left one shows a harsher break line where each activation area takes place. It has an interesting look, but I was aiming for a smoother melting kinda feel. The right GIF is showing the smoother activation solution and how the surrounding particle interaction blends together better.
Swirling
The second section of the tutorial will focus on a liquid volume of particles. To swirl them about we will use force modifiers. When applying an image color value to this type of build, it can be bit tricky. I will go over in detail how to approach this hurdle. The swirling effect can be cool looking if you choose a camera angle that’s offset and low like the GIF below.
With particle volumes, you really don’t have a simple surface to apply a texture to like with geometry. The texture application works very differently. For X-Particles it will require using the xpColor shader option and working in shader space. Thankfully we will have a visual to work with as we manipulate the image when applying the color to the particles.