June 17th 2019 08:00:26am
Something Different
This week I decided to make something a little different. I’ll be using only native Cinema4D tools to create this one. Titled “Uncoil Springy Thingy” initially when I created it. I didn’t think that would really be that approachable for a video tutorial, so Geometry Growth it is.
Start simple
A really smart way to think when creating anything it to start simple. Whether you block out a path for animation, use a basic shape before defining a character, or even thinking of a base action that begins a system. Thinking simply and building upon that foundation is difficult for some creatives to do. Many see the final product in their heads and struggle to break it down into it’s core components. This results in a lot of frustration, and needless headaches during the creating process.
Discovery through trial and error is a great way to create new ideas. You force yourself to just try new things without penalty other than use of time. I know this is rarely a possibility when you are under the gun with a client that has given you no direction, no money, and yet expects results tomorrow morning. Which needs to change, but that is a whole other discussion.
Us By Night
I had gone back to a title piece I’ve loved for awhile now. The opening titles created by Simon Holmedal, for Us By Night is just a beautiful elegantly created visual. This endless growth of crystal rock that the camera travels along with is just stunning. Be sure to check out the process reel afterwards too, it will give you a quick peak at a few Houdini snippets that were built.
Springy thingy
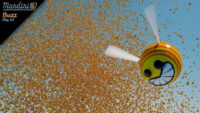
After a bit of messing around with the base concepts on my own creation in Cinema4D, I got something kind fun and springy. I wasn’t aiming to replicate Simon’s work verbatim, just apply the base principles to my own creation. Once I had the base uncoiling action, I applied some animation to the scale and rotation to mix it up a bit more.
After creating the base element, it just became an exercise of fingering out some timing and surface to place the springy thingy onto.
This particular result I had placed onto a pill object to have it climb upwards. This test was rendered in Redshift3D.
Geometry
Altering the look of this build is as easy as changing the source geometry base shape. Setting different values on the Effectors used, or even using different Effector objects will change the resulting visual. This is where the discovery part of the process comes in. You really have to play with parameters and combinations to evolve the look.
There are many possibilities to achieve. If you do use this build to get you started, please share your results on social media. I am always curious to see what users come up with, or how my tutorials get implemented into your daily creations. Use the hash tag #geometrygrowth if you post something from this build.